How to buy hosting and register a domain name
Buying hosting and domain name registration

Thanks to hosting, an online store becomes available to customers in different countries around the clock. Domain is a text address with which customers find the desired server in the browser. The WordPress site has developed hosting with different tariff plans. Each user can choose a plan that corresponds to the number of products in the store. Annual hosting costs up to $62, depending on the package you choose. When you purchase it for a year, a free domain registration is provided for entrepreneurs in the known zones:
com;
net;
com.ua;
org;
in.ua.
A complete list of zones is displayed in the process of creating an order.
Peculiarities of testing hosting
You can try a test hosting for a month, which is provided on a free basis. This option will help to evaluate all the features of the service and create an online store on “WordPress”. The development of an online store requires special knowledge, so its creation should be entrusted to professionals.
Selection of the standard package of services
After testing, a certain amount is paid monthly for the host, which is calculated according to the needs of the businessman. This allows you to keep the online store site on a WordPress server. The cost of packages varies. To host a simple commercial outlet, the basic services of a provider are sufficient. Each provider offers packages of different cost, speed and with possible additional services.
Characteristics of the service offered
The download speed has an impact on the conversion rate, so this aspect is taken into account when choosing the right hosting. 3 Gb of online space is quite enough to create an online store with many categories, with guaranteed fast loading and support for PHP- and MySQL-versions.
Goals and objectives of the domain name
Due to the sufficient volume, it is ensured secure data transfer and the possibility of registering the original domain. It should attract the Google algorithm and potential customers. The name is better to choose a short, unique, easy to pronounce and describing the service or products of the entrepreneur.

What is the essence of boxed products
Boxed installation.
WordPress instruction in the next step involves loading the platform. This is done by a few mouse clicks after the URL is defined. In the hosting client menu, you need to get FTP access to the web site on which you plan to create a store. The user takes the general data for the MySQL record here as well. In the account is required to make all the necessary settings and download WordPress on the official site. After that, the package must be unpacked.
The content of the “WordPress” directory is downloaded to the user’s space by applying FTP:
wp-admin;
wp-load.php;
index.php;
wp-content;
wp-includes.
Before you create an online store on WordPress, refresh the page in your browser, and then begin the automatic installation.
How to determine the selection of a template
Choosing a template
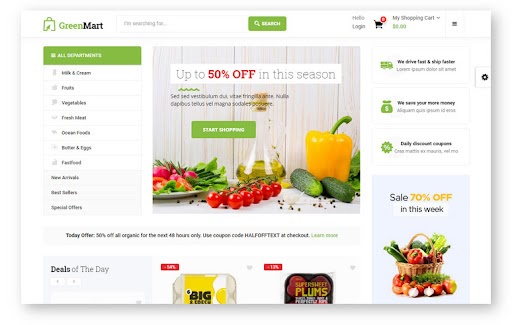
The popular WordPress service for an online store will be appreciated by every novice user. In order to create a successful business, the entrepreneur needs to be sure to think about the theme. It is considered the heart of the site, as it determines the complex layout.
Working out the theme of the site
Experts recommend to be guided by competing web sites and take into account design trends. The originality of the topic and an extraordinary approach helps to create a demanded among customers store. Subject matter should correspond to the selected group of goods or services offered, respectively, determined by the layout of the page.
Using ready-made templates
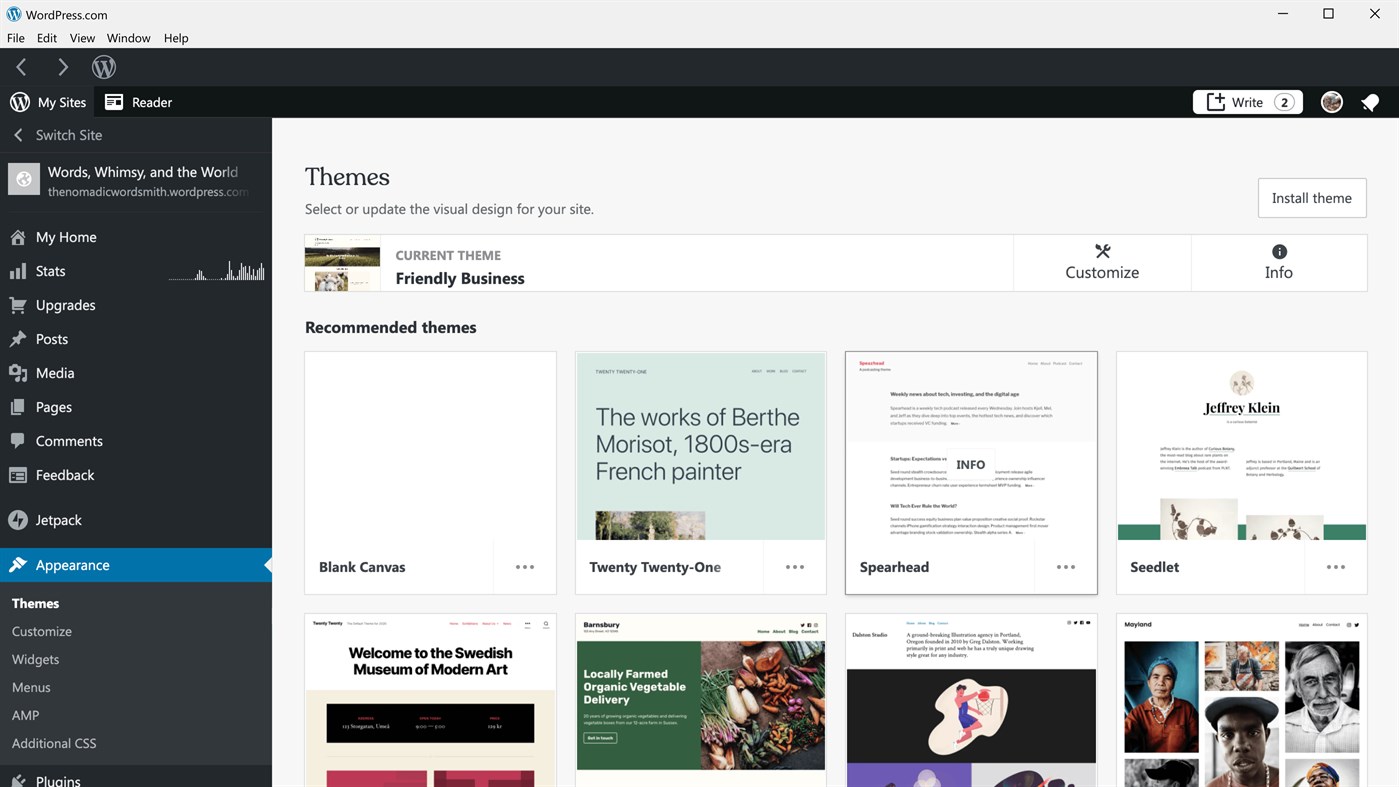
You can choose a ready-made template on the Internet or make it yourself. On “WordPress” offer options of free themes for users. Having decided on the choice, it is recommended to go to the tab labeled: “Design”. Then you need to open the item “Themes”, select the desired name and activate it.
Setting important parameters
With the help of the editor of WordPress, drag and drop content elements: text, images, widgets or information field. The service provides individual modules that are easy to construct. Wanting to make your page original, you should customize the template by using editing tools. Adding a logo or widgets will make your online store unique. Extraordinary can be achieved by using paid themes that are purchased once for the whole time of use.
Creating the structure of the site
After determining the layout of the site traced its structure. The next step is to distribute authority among those involved in the business:
administrator;
author;
editor;
employee;
subscriber.
The division of responsibilities is carried out in the “Management” category.
Features of the development of an online store on WordPress
Creating an online store on WordPress
The popularity of WordPress is growing, thanks to the countless plugins and extensions that are regularly updated and developed. This platform supports a variety of software, and providers are experienced in creating CMS. If a user has problems, technical support representatives will help with skills and knowledge. Development services are provided by experienced IT specialists. WooCommerce plugin, which functions on the “WordPress” platform, will allow you to create your own store online without much difficulty.
How to install the right plugin
Installing the plugin
In order to provide the functionality of the online store, you need to install a plugin.
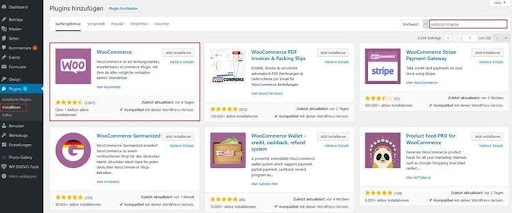
Most commercial online services work with WooCommerce plugin, as it can be used for free. Installation is done by clicking on the “Plugins” button. A pop-up window reveals the WooCommerce icon and clicks “Install Now”. After doing this, the plugin is activated.
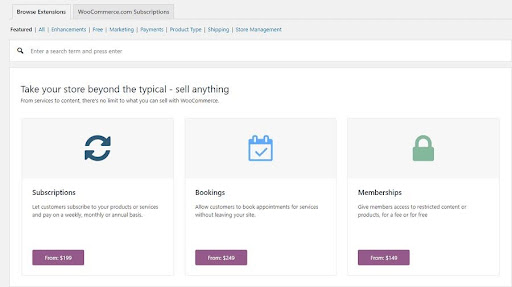
Installing the WooCommerce extension has some differences compared to other WordPress plugins.
The WooCommerce extension can only be accessed if you have an account on the WordPress site. Having decided on a plugin, the user either downloads it or buys it. To manage subscriptions, the user needs to connect a personal account. When downloading an extension from a third-party resource, the file is simply downloaded or sent to the user’s email address after purchasing it. Each user must receive a zip file (it is installed automatically after downloading from the platform).
Customization features
Store settings
Looking for settings on the service should be on the panel on the side in the column “General”. In “Settings” you specify:
the user’s online address;
time zone;
language;
other information.
Information about the delivery location and currency selection should also be displayed in this item.
Setting up the menu by products
It is possible for users to apply additional settings in the Products item. Any parameters, including units of measure, are easily customizable. The tax rate of the country in which the user works should also be set in the VAT column. Small business owners do not pay this rate, so they write 0% in the column. When printing the invoice, a note that the entrepreneur is a small business is also indicated.
Delivery and payment options
Delivery and its conditions are specified in the settings in the item “Delivery”. Thanks to the clever interface of the site in the settings you can designate the countries where the products will be sent, or set the delivery zone with different conditions and prices for it. The section “Cashier” provides a system of payment processing. You can choose the popular payment systems PayPal, Payoneer or a card of the bank which has signed an agreement to accept payments.
Changing profile settings
Creation of a profile of buyers/customers is also managed. To perform such actions it is recommended to open the settings menu. Each online store director himself determines the redirection of the customer to activate the account. This item displays passwords, logout and mapping system.
Configuring customer correspondence settings
Customizable customer correspondence and transaction accounting: types of notifications, selection of specific recipients, and others. Email templates can be changed. Adjustments range from the recipient’s name to individual background colors and texts.
How to configure widget settings
Widget setup
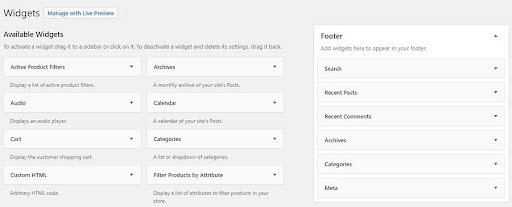
Before making an online store on WordPress final, you need to consider everything to the smallest detail. When setting up the content, it is recommended to think carefully about navigation. This will help the customer to quickly navigate the page and find the right products.
Widgets are usually included in plugins. They are provided in the form of blocks that add special functionality to the store. They can be moved to the widget area and then appear in the frontend.
The main navigation on the page is generated using the WooCommerce installation wizard:
product overview in the store;
digital display of customer orders in the shopping cart;
purchase processing and payment display at checkout;
Customer profile with orders and contacts in his account.
The sidebar displays a “Pages” column which is used to generate new pages for the online store. By selecting the “Change” option for a specific department, the user can place the product in different positions on the website. Parent pages are selected in the “Page Attributes” – “Parents” window.
When creating an online store, it is worth knowing that the navigation menu can be controlled, adapted and unfolded in the “Design” item. The actions are performed after entering a new name in the subsection “Menu”. On the left side in the “Menu Structure” the necessary pages are added and the settings are saved. The main pages can be moved down.
On the WordPress platform you can choose the desired design and adapt it to the interface of the store. The appearance must match the name of the online store, display its assortment and take into account the needs of the target audience, which the entrepreneur expects.

How to work in an online store
Store management
After creating the necessary pages for the commercial outlet online and setting them up, the entrepreneur can start placing the first products and describing them. To create a new product, simply click on the key labeled “Products” located on the left. The site provides options from which to choose according to color and size. If the entrepreneur demonstrates a product that is not physically available, it is marked as a product to be loaded and marked with a checkbox: “Virtual” or “Loadable”.
Functional features for adding products are clear to all users. When creating a store it is necessary:
come up with a description of the products;
to choose photo illustrations;
find keywords;
create a gallery.
The result of painstaking work will be the creation of the first page of the offered goods. All settings can be changed by the user at any time.
When selling different products it is recommended to divide them into categories. This feature will help customers to quickly find the right product. To do this, select the column “Categories” in the menu “Products” on the platform and enter the necessary information. Specialists advise to provide a description and photo of the product for preliminary review, and then you should click “Add product category”. When you run the menu item “Preview”, the product page opens as it will be seen by the customers of the online store.

What additional parameters are offered
Advanced settings
Additional settings for the store can be found in the sidebar of the “WordPress” service. The functionality is very extensive, so each user can choose what they need. With the tools you can:
create vouchers;
manage orders;
create reports;
get other features.
Before the online store on WordPress from scratch is fully ready to go, it is advisable to study all the functionality and decide whether any additional feature is needed, to find a separate plugin for it.
The entrepreneur should think about the contract, data protection, terms and conditions, and cancellation of orders. Other important details are also displayed in the settings:
Clear button;
delivery terms;
GDPR;
cost and tax data.
When setting up a commercial outlet online, you need to consider the laws of other countries. Customers from foreign countries can buy from an online store. All legal aspects for outside sales must be strictly followed by the merchant.
What else is worth mentioning
Other features
The functionality of WooCommerce can be increased by using additional applications. With XL WooCommerce software sales triggers, one of the 7 psychological triggers can be added to the merchant site being created. One option of these features is a countdown that creates urgency or displays potential cost savings.
Creating an online store on WordPress, examples of competitors are worth considering.
This plugin is used for sales, advertising, specials and pricing. Search engines Google, Bing, Yahoo are the main source of traffic for WooCommerce stores. If shoppers enter keyword queries, the products they’re looking for will appear at the top of the query. All product information should be accurate and clear. It is worth paying attention to navigation, design, descriptions and keywords.
When ordering hosting for WordPress, every user will get the desired result. Order the development of an online store in our company KUBAS Labs by ordering on the website or call on the specified phone number. Our managers promptly answer all questions concerning the creation of an online store.
